Last Tuesday at 2:00 AM, the steady rhythm of an Oregon rainstorm turned into a frantic drip hitting a plastic bucket in your living room. It's a sinking feeling every homeowner dreads. When water starts coming through the ceiling, you don't have time to wait for a sunny day or a two week lead time. You need an emergency roof repair immediately to protect your home from structural damage.
We know that seeing water damage on your walls feels like watching money disappear. It's frustrating to wonder if you need a whole new roof or just a reliable fix for a specific problem. This guide shows you exactly how to stop an active leak in under 30 minutes and how to find a licensed professional who specializes in quick, durable repairs. We'll cover the steps to prevent rot and help you decide between a quick patch or a larger project. With over 15 years of experience serving our local community, we've seen how a fast response saves thousands of dollars in long term repairs.
Key Takeaways
- Learn the immediate interior steps to contain water damage and use the "bucket and nail" trick to safely manage ceiling bulges.
- Discover how to distinguish between minor cosmetic issues and serious structural threats caused by Oregon’s wind and moss.
- Master the basics of temporary roof tarping using simple tools to protect your home until help arrives.
- Understand how to verify a contractor's Oregon CCB status to ensure you hire a licensed professional for your emergency roof repair.
- Find out why 15 years of local experience and specialized leak treatments are essential for protecting your Pacific Northwest home.
What to Do the Moment You Spot a Roof Leak
You hear that rhythmic thud of water hitting your floorboards and your stomach drops. Don't panic. You need to act within the first 10 minutes to save your flooring and drywall from permanent rot. In my 15 years of experience helping homeowners, I've seen how a quick response can cut repair costs by 60% or more. The first step is always to contain the mess before the water can spread into your electrical outlets or under your carpets.
Grab a 5-gallon bucket and place it directly under the drip. If the water is splashing out, pin a piece of string to the ceiling so the water follows the cord directly into the container. If you see a bulge in your ceiling, that's a sign that gallons of water are pooling on top of the drywall. Use a screwdriver or a 3-inch nail to poke a small hole right in the center of that bulge. It feels wrong to damage your ceiling further, but this "bucket and nail" trick releases the weight and prevents the entire sheet of drywall from collapsing on your head.
Insurance companies require proof for an emergency roof repair claim, so don't start cleaning until you've documented everything. Take at least 12 to 15 clear photos of the leak, the damaged ceiling, and any ruined furniture. I recommend recording a 30-second video with your phone to show the rate of the drip. This digital evidence, complete with the 2024 time and date stamps, is your best tool for getting a fair settlement from your adjuster later on.
Never get on a roof while it's raining or the wind is blowing. According to safety data from 2023, nearly 25% of work-related falls involve ladders or roofs, and those risks double on wet surfaces. When you're dealing with different Roofing materials like asphalt shingles or cedar shakes, the surface becomes as slick as a sheet of ice the moment it gets damp. Staying on the ground is the only way to stay safe during the initial surge of a storm.
Containing the Interior Damage
Move your electronics and wooden furniture at least 6 feet away from the drip zone immediately. Water travels along rafters, so a leak in one spot might actually be coming from 10 feet away. Cover your heavy items with 4-mil heavy-duty plastic sheeting to prevent secondary moisture damage. If the carpet is already wet, use a wet-dry vacuum to pull out as much moisture as possible before mold starts to grow within 24 to 48 hours.
While a wet-dry vacuum helps, for significant water saturation, professional extraction is the safest way to prevent mold growth and salvage your flooring. As an example of the type of services available, you can check out Commercial Carpet Cleaners Stockport to see how specialists handle water damage.
Initial Exterior Assessment from the Ground
Once the rain slows down, step outside with a pair of 10x42 binoculars to inspect the roofline from the safety of your lawn. You're looking for 80% of the common culprits: missing shingles, twisted flashing, or cracked chimney seals. Check for fallen branches that might have punctured the surface during the wind. Identifying these "obvious" entry points now will help you explain the situation clearly when you call for a professional emergency roof repair. Look closely at the vents and valleys, as these are the most frequent spots for seal failure in our Pacific Northwest climate.
- Check the gutters for large clusters of shingle granules.
- Look for "shiners" or nails that have backed out of the wood.
- Inspect the metal flashing around the chimney for gaps larger than 1/8 inch.
Is It a True Roofing Emergency? Identifying the Damage
You need to decide quickly if your situation requires an emergency roof repair or if it can wait until the next business day. A true emergency puts the structural integrity of your home at risk. If water is actively pouring into your living space or if the roofline looks physically different than it did yesterday, you've got a crisis. Cosmetic issues, like a few discolored shingles or a small piece of trim that fell off, don't usually require a midnight tarping session. We prioritize safety and "peace of mind" for our neighbors, so identifying the scale of the damage is always the first step.
In the Pacific Northwest, our roofs face specific challenges that homeowners in other regions don't deal with as often. During the heavy rain cycles we saw in the winter of 2023, many local homes suffered from three main culprits:
- Moss buildup: Thick moss acts like a sponge. It can hold 20 times its weight in water, which rots the wood decking underneath over time.
- Wind-blown shingles: High-altitude gusts can strip away "squares" (100 square foot sections) of roofing in minutes.
- Clogged gutters: When water can't flow through the downspouts, it backs up and "wicks" under the starter shingles, rotting your fascia boards.
Most leaks don't actually start in the middle of a shingle. They start at the "transitions." Flashing is the thin metal installed around chimneys, skylights, and in the valleys where two roof sections meet. If this metal pulls away or the sealant fails, water finds a direct path into your attic. Learning how to repair a leaky roof often involves inspecting these metal components before you even look at the shingles themselves. If you see water stains on the ceiling directly below a chimney, the flashing is your primary suspect.
Assessing the scale of the damage helps you decide between a patch and a full replacement. If your roof is over 20 years old and has lost more than 15% of its granules, a temporary tarp might be the last bit of help it can take. However, for a younger roof, a targeted emergency roof repair can extend its life by another decade. If you aren't sure about the state of your shingles, getting a professional roof inspection from a local expert with 15 years of experience can save you from making an expensive mistake.
Signs of Structural Roof Failure
Structural failure is a major threat to your safety. You should look for visible sagging in the roofline or rafters from the street. If the ridge of your house looks like a "swayback" horse, the internal supports are failing. Other signs include losing more than one square of shingles during a storm or finding active leaks in 3 or more separate rooms. These situations require immediate attention to prevent a total ceiling collapse.
Common "Quick-Fix" Scenarios
Not every leak is a catastrophe. Many issues are "quick-fix" scenarios that don't require a full tarp. For example, a single shingle blowing off after a standard windstorm is a 20-minute repair for a pro. Gutter backups that cause water to drip behind the siding are often solved by a thorough cleaning rather than a roof tear-off. Cracked vent boots or dried-out caulking around a pipe are also common, minor issues that we handle regularly to keep homes dry.
Emergency Roof Tarping: A Temporary Survival Guide
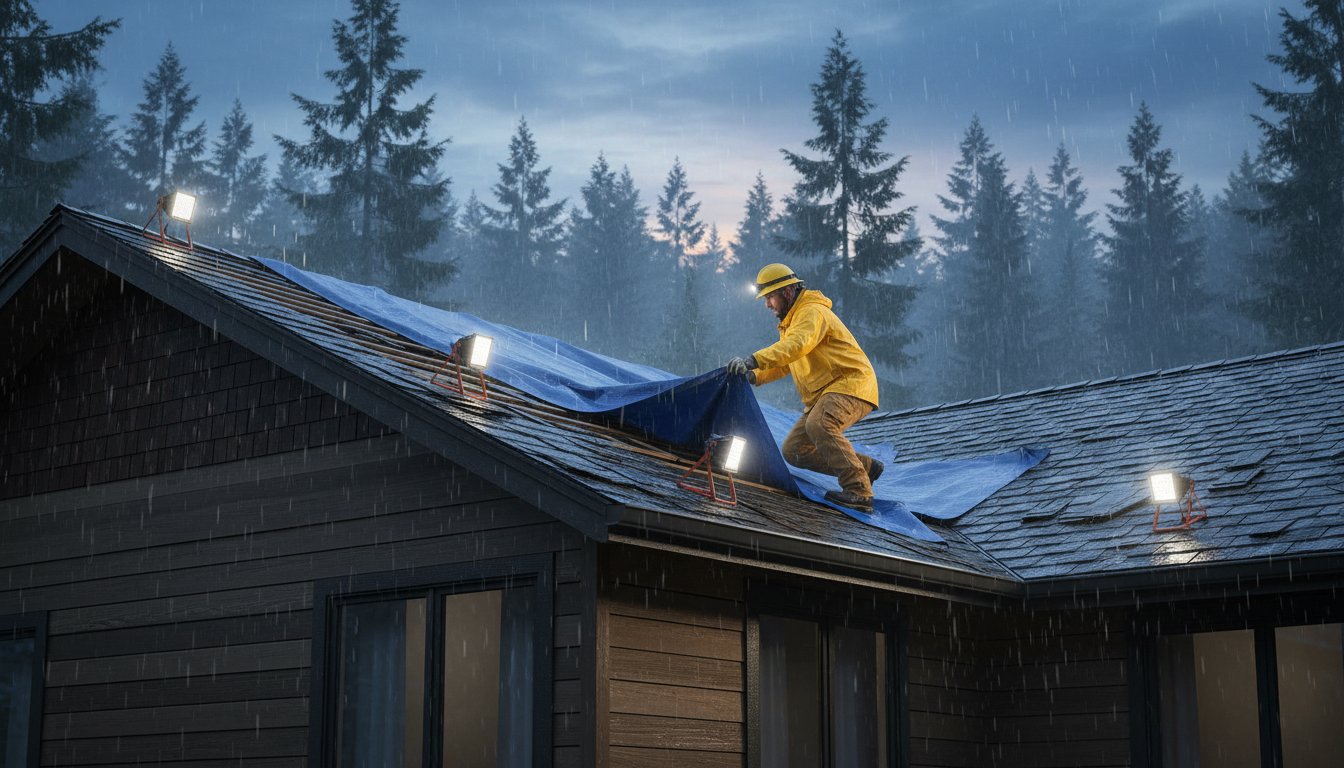
A sturdy tarp is your first line of defense after a storm. It isn't a permanent fix; it's a way to stop the bleeding until a crew arrives. Choosing the right material is the first step. You need a heavy-duty polyethylene tarp with a thickness of at least 6-mil. Thin, 3-mil tarps from a discount store will shred if wind speeds hit 20 mph. For a typical 1,500 square foot home, a 20x30 foot tarp usually covers enough area to handle a fallen branch or a patch of missing shingles. It provides the necessary coverage to overlap the damage by at least 4 feet on all sides.
You'll need a specific kit for this job. Grab four 8-foot 2x4 wooden boards, a box of 1-inch cap nails, and a sharp utility knife. Avoid using standard roofing nails by themselves. They'll pull right through the plastic during the first gust of wind. Cap nails have a wide, 1-inch plastic head that distributes pressure and keeps the tarp pinned down. This is a critical part of a successful emergency roof repair. Having these supplies ready in your garage can save you hours of searching when the hardware stores are packed after a major weather event.
The "Over the Peak" method is the gold standard for leaks near the top of your house. If you stop the tarp mid-slope, water will eventually run under the top edge. You must pull the tarp over the roof ridge and secure it on the opposite side. This ensures gravity works for you. Water flows over the plastic and down to the gutters instead of finding a gap in your shingles. It's a simple trick that separates an amateur patch from a professional-grade temporary fix. Always ensure the tarp is pulled tight to prevent water from pooling in the center, which can lead to a collapse.
Step-by-Step Tarp Installation
Safety is the priority. Never get on a roof while it's still pouring or if winds exceed 15 mph. Wait for a clear weather window. First, use a stiff broom to clear branches, pine needles, and loose granules. You need a flat surface to ensure a tight seal. Next, wrap the top edge of your tarp around a 2x4 board twice. This creates a "weighted" anchor that won't tear. Drive 3-inch exterior screws through the board and into the roof rafters. This prevents the wind from getting underneath the plastic and turning your tarp into a sail. Space your cap nails every 12 inches along the perimeter to keep everything taut.
When Tarping is Not Possible
Sometimes a tarp isn't the right tool for the job. If the damage is on a vertical surface like a dormer wall or chimney flashing, gravity makes tarping difficult. For holes smaller than 2 inches, use a high-grade roofing mastic or "wet patch" cement. This material is designed to stick even in damp conditions. Apply it with a putty knife to create a 1/4-inch thick plug over the leak. If the damage covers more than 30% of your roof surface, don't attempt a DIY fix. Call for professional backup immediately. Most local contractors with 15 years of experience can install a commercial-grade shrink-wrap or industrial tarp in under 3 hours. This protects your investment while you wait for a full emergency roof repair estimate.

Choosing a Local Professional for Emergency Roof Repair
Finding the right person to handle an emergency roof repair shouldn't feel like a gamble. When water is actively leaking into your living room, you need a solution that works the first time. Most homeowners wonder if they should call a massive roofing corporation or a local handyman. Large roofing companies often prioritize $25,000 full-roof replacements. They might put a small leak or a tarping job at the bottom of a two-week waiting list. A local handyman typically offers a faster response time for small-to-medium repairs. We usually arrive at your property within 24 to 48 hours, while bigger crews are still processing your paperwork.
Oregon homeowners must be wary of "storm chasers." These are out-of-state crews that flood neighborhoods after high-wind events like the 2021 ice storms. They often lack a local physical address and disappear once the rain stops. Hiring a local expert means you're working with someone who understands the specific challenges of the Pacific Northwest climate. We've spent over 15 years seeing how moss and constant moisture can rot out a roof deck if a repair isn't handled correctly. A local reputation is built on years of being seen at the neighborhood hardware store, not just a flashy truck wrap.
Getting a fair estimate is about transparency. A standard emergency tarping or minor shingle replacement in Oregon typically costs between $250 and $650 depending on the roof pitch. If a contractor quotes you $1,500 just to nail down a plastic sheet, they're likely taking advantage of your stress. A reputable professional provides a clear breakdown of labor and materials before they climb the ladder. You deserve a price that reflects the actual work performed, not the urgency of the situation.
Why Licensing and Insurance are Non-Negotiable
Hiring "under the table" workers is a massive risk that rarely pays off. If an uninsured worker falls off your roof, your homeowner's insurance might not cover the medical bills, leaving you personally liable for six-figure costs. The Oregon Construction Contractors Board (CCB) protects you from poor workmanship and fraud. Every legitimate professional must be licensed, bonded, and insured. You should always verify CCB# 254463, which is the standard held by Local Fishing Handyman LLC. This number ensures that the contractor has met state requirements for safety and financial responsibility.
Questions to Ask Before They Start
Before any work begins, ask the contractor if they provide before and after photos. Since you probably won't be climbing onto the roof yourself, these photos are your only proof that the emergency roof repair was done right. Ask how they handle hidden rot. If they find soft plywood under the shingles, they should tell you immediately rather than just covering it up. Finally, ask about the warranty. Even a temporary fix should have a guarantee that it will hold until a permanent solution is scheduled. You can get a professional emergency roof repair estimate today to ensure your home stays dry through the next storm.
Reliable Roof Leak Repairs with Local Fishing Handyman
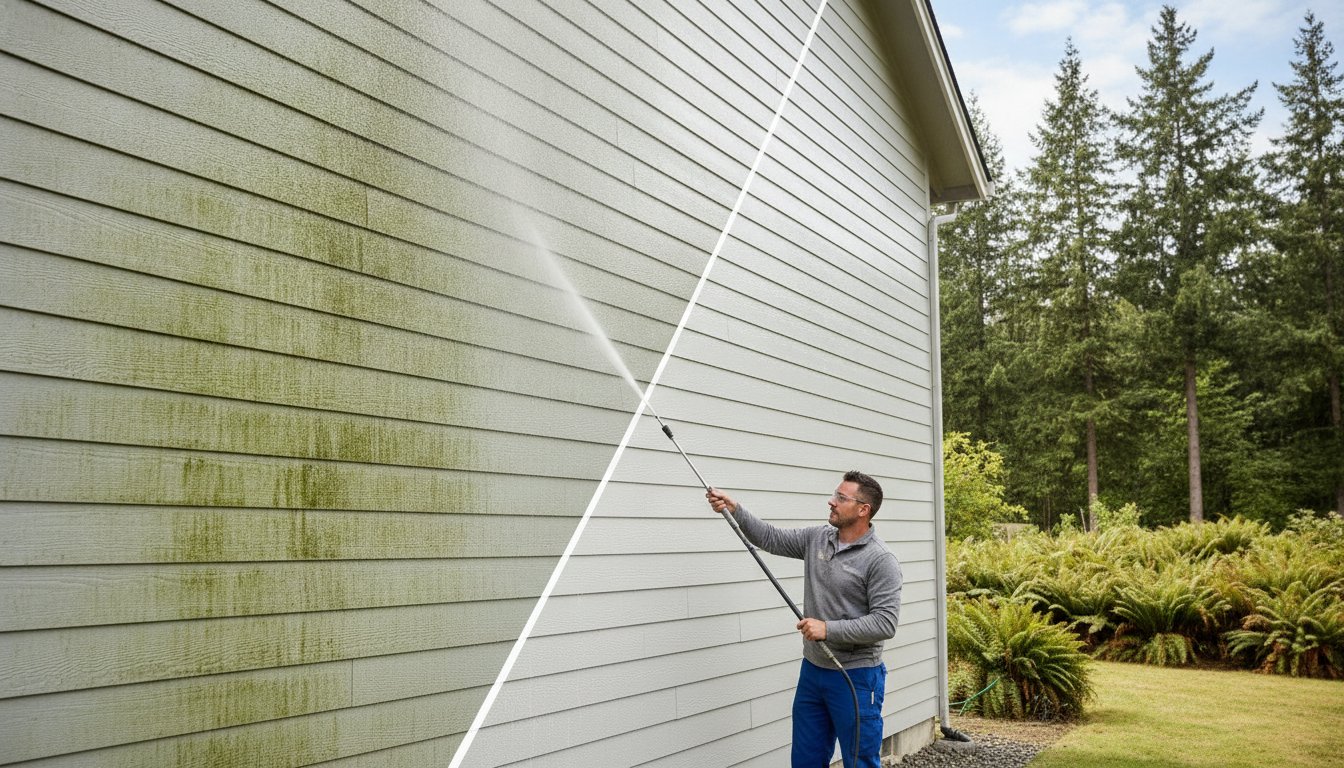
Oregon’s weather doesn't take breaks. With annual rainfall averaging 40 to 50 inches in many parts of the state, a small leak quickly turns into a structural nightmare. Local Fishing Handyman LLC has spent 15 years fixing these exact problems. We don't just throw a patch on and leave. We look at why the leak happened in the first place. Often, it's the moss. Oregon's damp environment allows moss to grow thick, which lifts shingles and lets water seep underneath. Our specialized "Moss-Off" treatment uses a gentle softwash approach. High-pressure washing can blast the granules right off your shingles, shortening your roof's life by 5 to 10 years. We avoid that. We use precision fixes that protect the integrity of your home while clearing away the debris that causes rot.
When you call for an emergency roof repair, you're looking for more than a quick fix. You're looking for a partner to help maintain your property. We handle more than just the peak of your house. Our team manages siding repairs, deck restoration, and gutter cleaning. If your gutters are backed up, water pools at the roofline, which is the fastest way to rot out your fascia boards. We treat the whole house as a single system to keep you dry all year long. A clean gutter system can divert over 1,000 gallons of water away from your foundation during a typical Oregon storm. Ensuring these systems work together is the best way to prevent future water damage.
Community matters to us. We prioritize our senior citizens by offering dedicated discounts and a service style that's respectful and honest. You'll never deal with a high-pressure salesperson. You get straightforward answers and durable solutions that respect your budget. Our goal is to provide the security you need to feel safe in your home, regardless of the season. We believe that every homeowner deserves a craftsman who shows up on time and treats their property with genuine care. This commitment to reliability has helped us build a reputation for excellence over the last decade and a half.
- Licensed, Bonded, and Insured: We protect your investment with full professional coverage.
- Localized Expertise: We understand the specific challenges of Pacific Northwest homes.
- Comprehensive Care: From the shingles to the siding, we ensure your home's exterior is watertight.
The Local Fishing Handyman LLC Difference
You won't deal with a middleman or a call center. When you hire us, you talk directly to the expert who will be on your roof. We specialize in the "Moss-Off" treatment because we know it prevents 90% of future leaks. Our focus is on durable, no-nonsense solutions that protect your home's longevity without breaking your bank account.
Getting Your Free Estimate Today
We serve homeowners across the entire state of Oregon, bringing 15 years of local expertise to every job. To get started, simply reach out through our website. Please provide a contact number so we can call you back immediately to discuss your project. Getting your emergency roof repair handled shouldn't be a headache. Contact Local Fishing Handyman LLC for your roof repair estimate and get the peace of mind you deserve.
Secure Your Home Before the Next Storm Hits
Roof leaks don't wait for a convenient time to happen. When water starts dripping through your ceiling, every minute counts to prevent structural rot and mold growth. You've learned how to identify true damage and how to apply a temporary tarp to buy yourself some time. While these steps are vital for immediate protection, a tarp is never a permanent fix. You need a durable solution that stands up to the Pacific Northwest rainy season and keeps your household safe.
Local Fishing Handyman brings over 15 years of local experience to every job site. We understand the specific wear and tear our regional climate puts on shingles and gutters. As a licensed, bonded, and insured contractor (CCB# 254463), we handle your emergency roof repair with the precision and care your home deserves. We take pride in our honest, hardworking approach to protecting your investment. We also offer senior citizen discounts to ensure our community neighbors can always access reliable help. Don't let a small leak turn into a major renovation project. Take action now to keep your family dry and comfortable.
Get Peace of Mind-Contact Local Fishing Handyman for a Roof Repair Estimate Today!
Frequently Asked Questions
How much does emergency roof repair typically cost in Oregon?
Emergency roof repair in Oregon typically costs between $300 and $1,500 depending on the damage and roof pitch. Most homeowners pay around $600 for a standard tarping service to stop active leaks during a storm. Factors like a 2 a.m. call-out or a steep 4/12 pitch will increase the final bill. This investment protects your home from much more expensive structural water damage.
Can a handyman legally fix a roof leak in Oregon?
A handyman can legally fix a roof leak in Oregon as long as they hold a valid license from the Construction Contractors Board (CCB). Oregon law requires any contractor performing work for compensation to be licensed, bonded, and insured to protect the homeowner. We've spent 15 years maintaining these high standards to ensure every job is done right. For repairs under $1,000, a skilled local handyman is often the most practical choice.
What is the fastest way to stop a roof leak from the inside?
The fastest way to manage a leak from inside is to poke a small hole in the center of the ceiling bulge and catch the water in a 5 gallon bucket. This relieves the pressure on your 4x8 foot drywall panels and prevents a sudden ceiling collapse. You should then clear the area of furniture and electronics. This controlled drainage buys you time until a professional can get on the roof to apply a temporary tarp.
Will my homeowners insurance cover emergency roof repairs?
Most Oregon homeowners insurance policies cover emergency roof repair if the damage was caused by a sudden event like a 55 mph wind gust or a fallen Douglas fir limb. Roughly 90 percent of standard policies include a "Reasonable Repairs" clause that pays for temporary measures to prevent further loss. You should take 5 or 6 clear photos of the damage before the repair starts to help your claims adjuster process the paperwork.
How long can a temporary roof tarp stay on?
A temporary roof tarp usually stays effective for 30 to 90 days before the material begins to degrade. The 10 mil polyethylene plastic used in most tarps breaks down under UV exposure, which makes it brittle after 3 months in the sun. It's a short-term solution designed to keep you dry while you wait for a permanent fix. We recommend scheduling your actual repair within 4 weeks to avoid a second leak.
Should I repair or replace my roof after a major leak?
You should consider a full replacement if the damage covers more than 25 percent of your roof surface or if the shingles are over 20 years old. Small punctures from a single branch are usually fixed with a simple patch. However, if your roof is nearing the end of its 30 year lifespan, spending $1,200 on multiple repairs is often a waste of money. A new roof provides long-term peace of mind and better protection.
What happens if I ignore a small roof leak?
Ignoring a small leak leads to toxic mold growth in your attic within 24 to 48 hours of the first drip. Water quickly rots the 1/2 inch plywood decking and ruins R-30 insulation, which destroys your home's energy efficiency. What starts as a minor $200 repair can escalate into a $6,000 structural project if left alone for a single season. Constant moisture also attracts wood-boring insects that cause even more damage.
How do I know if my roof leak is caused by moss buildup?
You can identify moss-related leaks by looking for 2 inch thick green clumps that lift the edges of your shingles. In the Pacific Northwest, this moss acts like a heavy sponge that traps gallons of water against the roof's underlayment. This constant dampness rots the asphalt and allows water to travel upward under the shingles. Regular moss-off roof treatments are essential to prevent this specific type of moisture intrusion and protect your investment.